Corporate Messenger (VCM)® is a corporate instant
messaging solution. It is a robust, scalable, secure solution and belongs on
every corporate network.
Corporate Messenger® is an essential
addition to any desktop that allows instant notifications, file transfers, and
multi-person chats. It is the ideal solution in which to quickly transfer URL
links and contact lists such that the time to market is reduced.
Main Features
|
Corporate Messenger
(VCM)
has a number of features which are accessible via the buttons on the bottom
of the graphical user interface when Corporate Messsenger is not minimized.
Some of these functions are also accessible via the menu at the top of
Corporate Messenger or via right clicking on the Corporate Messenger icon
which is located on your system tray. These features include: · Add a User · Preferences · Status (Online/Invisible) · About |
|
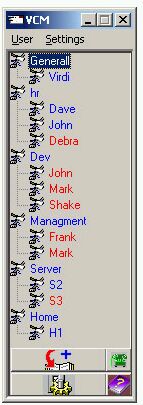
On the right you can see a picture
of Corporate Messenger when it is an active window and not minimized. Just
below you see an image of Corporate Messenger while it is minimized in the
system tray.

There are two ways of arriving to the
"Add User" window. One is to hit the User menu item and click Add.
The second is to click on large icon on the button of the Corporate Messenger
GUI when activated.
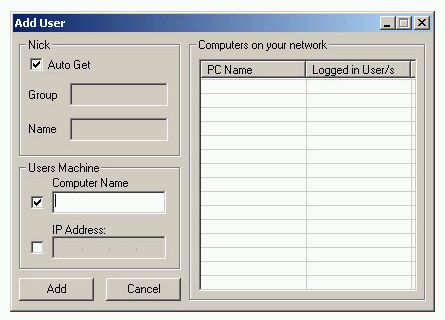
Corporate Messenger provides the user with
many options to add a user. The ease of use of Corporate Messenger lies in the
fact that it finds all the machines on the LAN and attempts to retrieve the
user IDs of the users who are currently running their Corporate Messenger
software. At this point you can simply click on the PC Name in the
"Computers on your network window" and click OK to add this user.
Another method of adding a
user is to enter the computer name of the PC you wish to add. Since Corporate
Messenger retreives computer names through WINS name resolution or DNS name
resolution, Corporate Messenger allows you to type the machine name via its
regular english read name or via it's IP address.
Corporate Messenger relies exclusively on
the TCP/IP stack and hence only this layer of the network protocols are used.
Hence Corporate Messenger runs perfectly on or off the internet, but unlike
popular messengers, securely transmits these messages in an encrypted fashion.
Finally the "Nick"
group allows you to give the logged on user a specific group and username if
you prefer, or if "Auto Get" is left checked, Corporate Messenger
automaticaly retreives the group and name of the user via Corporate Messenger
contacting the other agent.
Preferences
The preferences panel can be reached
via two ways. One of the methods is to click on the Settings menu and click
Preferences. The second way is to click on the large icon on the bottom of your
GUI for Corporate Messenger, the icon with the gears.
Preferences allows the user to set
a variety of options in Corporate Messenger which range from hotkeys, to your
username and group and finally to small items like the beep you hear on
incoming messages.
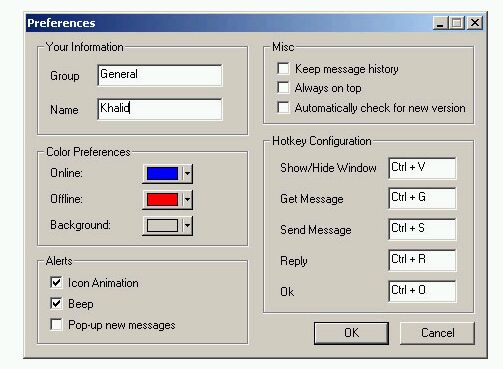
Your Information
Your information contains your group
name and your username. This is represented in a Group/Username fashion when
you are sending or receiving messages. You may specify anything you want here.
Note that users adding you to their contact list will only see your Group/Name
and that is assuming that they have not renamed you. Please choose a name which
allows people to understand who is messaging them.
Color Preference
This category of preferences allows
the user to customize the online colors of users and the offline colors of
users as well as the background color of the Corporate Messenger application.
The method in which to choose the color is simple and straight forward as a
standard Microsoft color picker.
Alerts
There are three alerts which Corporate
Messenger allows the user to define. Namely the icon animation that occurs when
a Corporate Messenger user sends you a message. The beep that you hear when
another user sends you a message. Finally Corporate Messenger has the ability
to automatically pop up a message if a new one is received by you, as opposed
to clicking on the system tray icon for Corporate Messenger or clicking on the
user name who has the blinking icon beside their name.
Misc
Corporate Messenger has the ability to
store your message history for every conversation you have through it via the
"Send Message" function. This check box allows you to turn on
Corporate Messengers feature to keep track of the message history between you
and every user on your contact list.
Always on Top is a feature which
allows Corporate Messenger to remain as the top most level window no matter if
other windows are placed on top of it, such as Microsoft Word or Microsoft
Excel. Corporate Messenger will always remain the top most level window.
Automatically check for new version,
checks for the latest version of Corporate Mesenger either through the internet
or through the corporate network to see if a newer version exists. If it does,
Corporate Messenger automatically downloads and installs it.
Hotkey Configuration
The Hotkey Configuration allows the
user to specifiy a set of hotkeys to conduct a variety of tasks through
Corporate Messenger.
Show/Hide Window allows the user to
specify a key to minimize and restore the Corporate Messenger window.
Get Message allows the user to
preprogram a key which popups up the latest message upon pressing of this key
combination. This eliminates the need to actually move your mouse to the system
tray and click on the Corporate Messenger icon. This can be rendered useless by
the "Pop up new messages" alert.
Send Message allows the user to
"hit" the send key via this key combination rather than to actually
move the mouse over the send button and click.
Reply allows the user to
"hit" reply without the added mouse movement of moving your mouse
over the reply button.
Ok allows the user to close a message
notification or click "ok" without having to move your mouse over the
ok button and click it.
Online Status
(Online/Invisible)
The Online Status feature of
Corporate Messenger allows you to alter your current state of operation. Online
allows you to report to your other Corporate Messenger peers that Corporate
Messenger is currently running on your system and implies that you are
available for any message notification.
The invisible option allows you to
remain online the Corporate Messenger network, but does not notify your
Corporate Messenger peers that you are online. Hence to them it appears as if
your copy of Corporate Messenger is not running. You are still able to message
peers while you are invisible mode.
Offline operation may only be
achieved by exiting Corporate Messenger. Note that this option is not availabe
in the "service" version of Corporate Messenger. In that case the
service must be disabled.
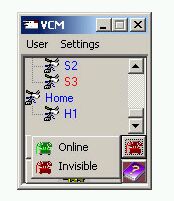
The status feature of Corporate
Messenger may be accessed in one of two ways. One method is to click on the
Settings menu and click Status. The second method is to click on the small icon
above the help on the bottom of the front of the Corporate Messenger GUI. An
illustration follows.
About
Purely a non-functional feature of
Corporate Messenger, the about page provides the user with a wealth of
licensing and credit information about the product. A link to the corporate web
site is also provided.
Using Corporate Messenger implies that
the terms of the license agreement have been met, understood and will be abided
by.
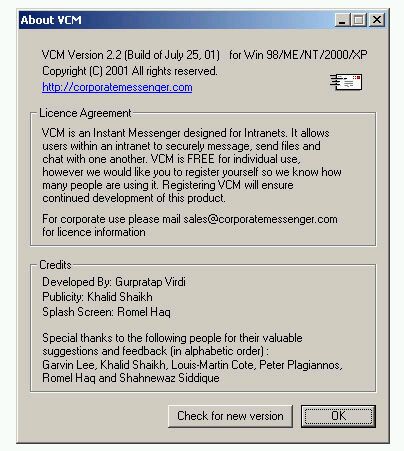
The about page also provides the user
with the build date of Corporate Messenger along with compability information
for the release.
Check for a new version allows the user
to execute the ability for Corporate Messenger to attempt to download a new
version and automatically upgrade itself.
User to User Communications
Corporate Messenger (VCM) has an additional
feature set which is only accessible by right clicking on a user's name located
in the user list in the main portion of the window.
Through right click on the
mouse on a user's name you may do a variety of functions which include:
· Send Message
· Chat
· Send File
· Send Contacts
· History
These functions are specifically those
that affect your interactive communication with that specific remote user,
whereas the functions located in User Settings are primarily how this user will
affect your contact list or you affect his contact list.
Send Message
In order to send a user a message
you must right click on the user's name and click "Send Message".
This will pop up the following dialog box:
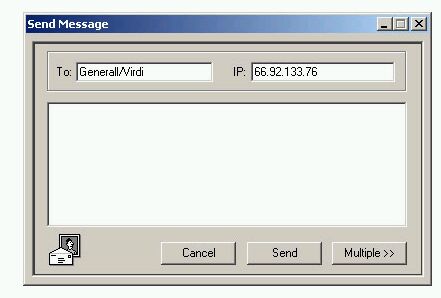
Type in the message you wish to send
to the Corporate Messenger user and click Send. The message will instantly
appear on the remote user's Corporate Messenger as a new message, alerting the
remote user.
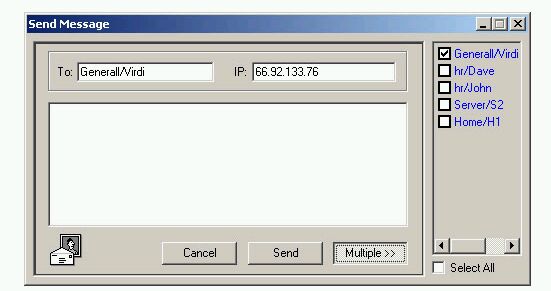
The multiple button allows you to
send one message to a series of users without having to do that manually
yourself. This is useful for broadcasting URLs or links.
Chat
Corporate Messenger's chat feature contains
a lot of functionality. It contains the ability to create secure encrypted
communication with a group of people simulatenously.

![]() The
user can access the chat functionality by right click on a remote user's name
and clicking the chat feature. This will send a chat request as illustrated by
the screenshot on the right.
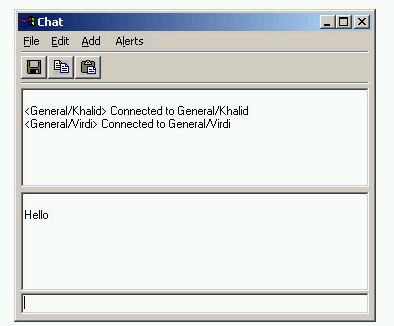
The
user can access the chat functionality by right click on a remote user's name
and clicking the chat feature. This will send a chat request as illustrated by
the screenshot on the right.
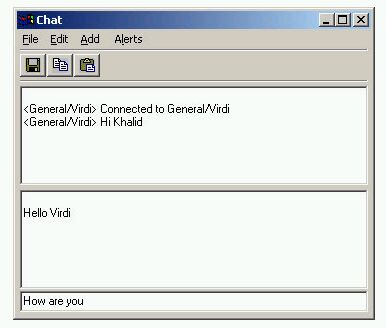
Furthermore when the chat is
established the user has the ability to type text at the text entry bar on the
bottom of the screen. This chat window shows a two way chat between two
Corporate Messenger individuals.
Through the file menu, the
user has the ability to save the chat buffer during the conversation. After the
chat has been completed, the contents of the chat buffer are completely lost.
Using the cut and paste functionality
of the Chat window allows you the take portions of your text and use them in
e-mails, or in another program such as Notepad. Pasting allows you to paste
previously written text in your text entry bar.
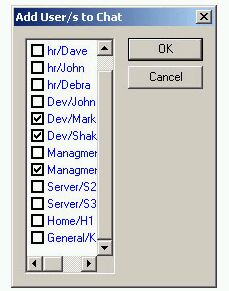
Add allows you to add an additional
user to your group chat. There are no limits to the number of users that can
join you in a group conversation.
The Chat Preferences dialog allows
you to configure a variety of settings.
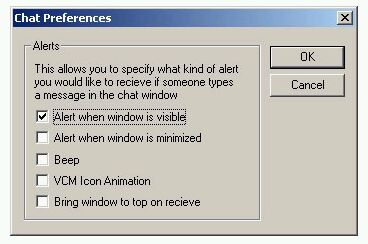
Alert when window is visible
Only performs the following alerts
if the window is visible and not when minimized.
Alert when window is minimized
Only performs the following alerts
if the window is minimized and not when visible.
Beep
Beeps if someone in the group
sends a new message.
VCM Icon Animation
Animates the Corporate Messenger
icon if someone in the group sends a new message.
Bring window to top on receive
Brings the chat window up to the
top level if someone in the group sends a new message
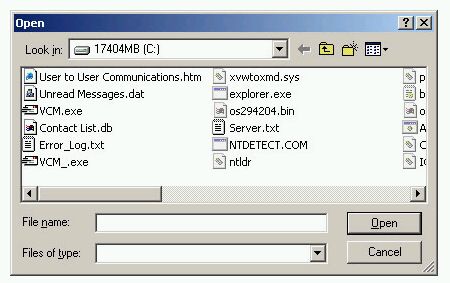
Send File
In order for the user to send a file
to a remote Corporate Messenger user, the user must right click on a name in
the contact list and click on "Send File".
A dialog box will then appear
asking the user which file they wish to upload to the remote user.
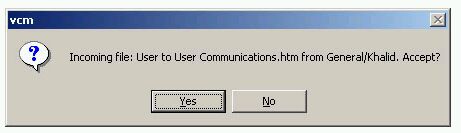
![]() Corporate
Messenger will then prompt the remote user if they wish to receive the
file. If the remote user accepts, then they will have to select where they wish
to save the file.
Corporate
Messenger will then prompt the remote user if they wish to receive the
file. If the remote user accepts, then they will have to select where they wish
to save the file.

The remote user will see the dialog
box asking if they wish to accept the file transfer.
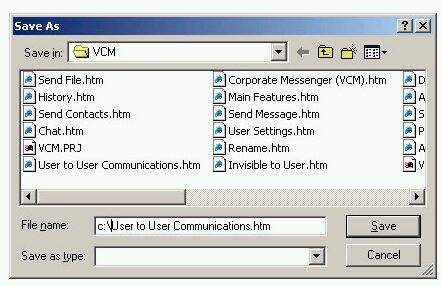
The remote user has to decide where
to save this file, assuming they hit yes above.
The file transfer starts. The sender
sees the following.

The receiver sees the following.
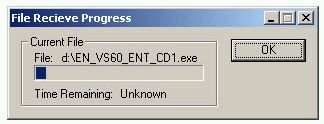
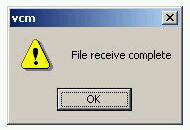
The file transfer will eventually
complete and then both users will see the following dialog box.
Send Contacts
Corporate Messenger allows the user to
send a portion of their contact list to a remote user on their contact list.
This allows for easy transfer of contacts to friends who already use the
Corporate Messenger.
The item is accessed via pressing the
right mouse button on a remote user's name and click "Send Contacts".
The following dialog box appears.
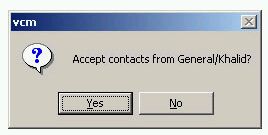
The remote user then receives an
alert as illustrated below which asks them whether they wish to accept the
contacts being transmitted. If they accept, the contact list will be merged
with their own. If the remote user declines, then the original user receives a
notification stating that the contacts were not added to the remote user's
list.
History
Corporate Messenger allows the user to
view the message history betweem themselves and a remote user. If the
"Keep message history" check box is checked in the Preferences panel,
then the user simply need go to his Corporate Messenger contact list, right
click on a user name and click on History.
Corporate Messenger then popups notepad
with the list of each message transaction that has taken place between those
two users.
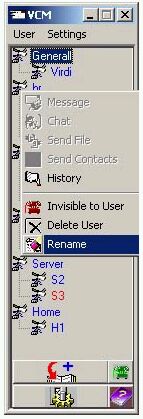
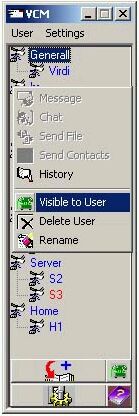
User Settings
Corporate Messenger (VCM) has an additional
feature set which is only accessible by right clicking on a user's name located
in the user list in the main portion of the window.
Through right click on the
mouse on a user's name you may do a variety of functions which include:
· Invisible to User
· Delete User
· Rename
These functions are the user settings
for the remote user on your PC. They specifically allow you to decide how you
want to appear on the remote user's contact list and whether you want them to
appear on your contact list. Whereas User to User Communications more
specifically deals with interactive interactions with a remote user.
Invisible to User
Via the very same method you can
re-enable "visible to user" and allow that very same user to see if
you are online/offline again. This feature can be applied to entire groups as
well as on a per user basis. |
|
Delete User
Simply click yes and the
user will be deleted from your personal contact list until you re add them.
Note that your history with that user will also be deleted. |
|


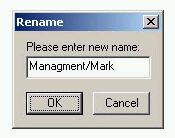
Rename
The name before the slash is the
group name whereas the name after the slash is the username. You may change
either or both if you wish. |
|